FlyingPress Ultimate Guide to GET 100% Website Speed Score. In today’s world of the Internet, website performance is vital. Users expect quick, seamless experiences, and search engines reward sites that deliver fast loading. Achieving a 100% score on performance metrics isn’t just about bragging rights it’s a crucial element of a successful digital strategy.
FlyingPress is your secret weapon in search results for perfection. This powerful optimization plugin is designed to enhance your website’s performance through various features and settings. It can push your site to outstanding speed and efficiency when configured correctly. This comprehensive guide will teach you through each step, ensuring you reach that elusive 100% score. Check out Speed Optimization here.

From essential general settings to advanced tweaks, you’ll learn how to make the most of FlyingPress. At the end of this guide, you’ll know exactly how to optimize your site to deliver an exceptional user experience and SEO results.
FlyingPress Ultimate Guide to GET 100% Website Speed Score
First things first, let’s get the basics right.
License Key: Make sure your FlyingPress License Key.
Table of Contents
1. General Settings
All optimizations are based on the general settings. You want to get these right from the very start.
License Key:
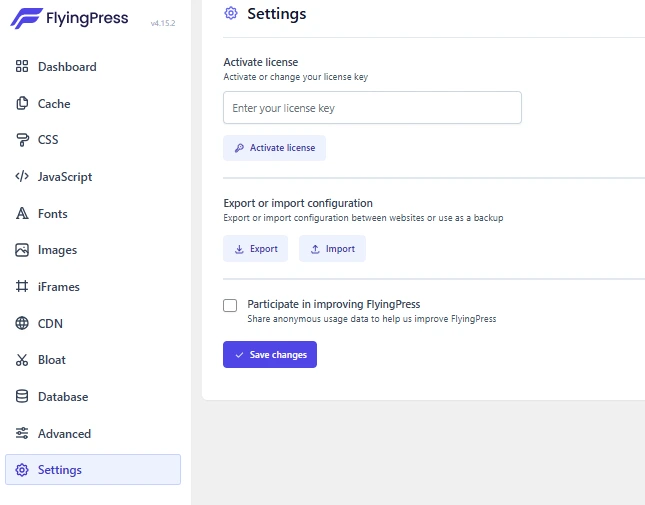
Make sure that your FlyingPress license key is active first and foremost. An active license unlocks all premium features and keeps you fully up to date on the latest updates and support. To use the license key, go to General Settings section of FlyingPress dashboard. Having a valid license gives you access to all the powerful features suitable for top efficiency.
Cache System:
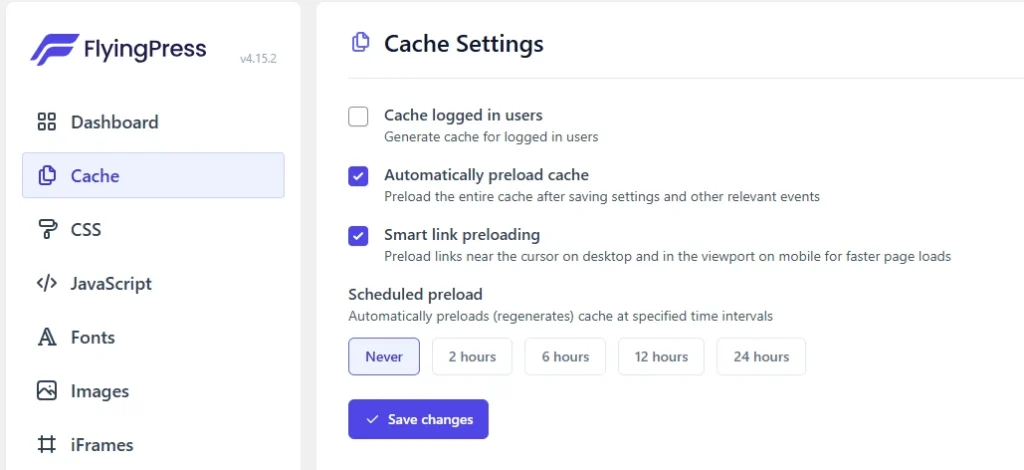
The cache system has to be enabled. Caching will generate static versions of your website, thus significantly reducing the server load and improving the time your visitors spend loading your site. For a high-performance score, and quickly loaded and pages, this is essential. from the Settings app, go to General and turn the Cache System on. Also select the options that suit your site’s needs such as excluding some pages from caching if they contain con templating-changing content.
This is a great time to pre-load if your site’s pages take a long time to load.
Preload Cache:
This is vital, because preloading generates cache for your site’s pages before a user requests them, so they load fast. To enable this feature, go into Cache > Preload and change the Preload cache option from ‘Off’ to ‘On.’ As such, users won’t have to wait for pages to load on the first instance, improving speed.
Preload Method:
For a more aggressive preloading strategy select ‘HTTP’ method. With caches enabled for each page, up into subpages deep within the site structure (completely), this also puts pages in the cache without waiting too long. This is why the ‘HTTP’ method uses server resources more intensively and makes the user experience faster.
Optimize CSS Delivery
Styling your website with CSS is crucial, but if not done properly can become a bottleneck.
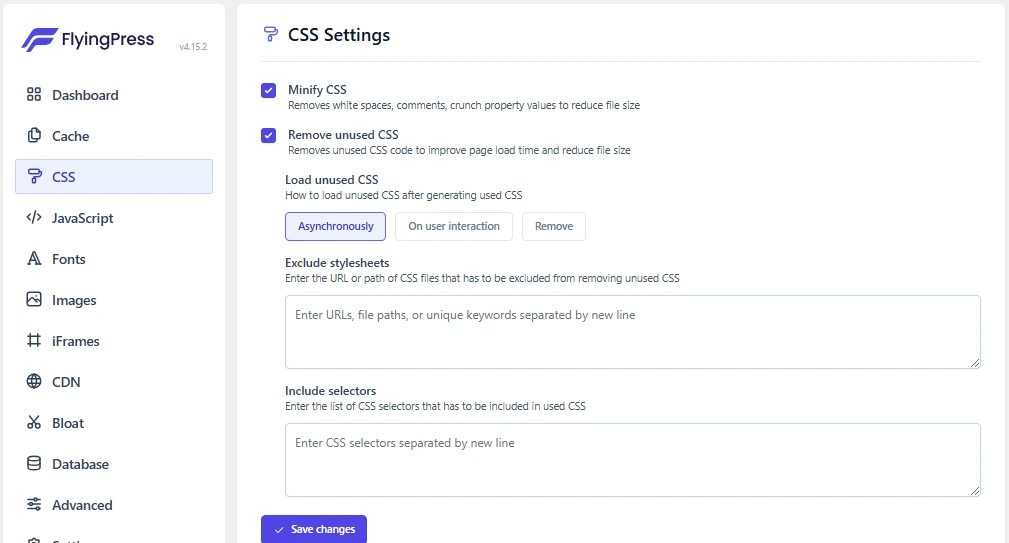
Minify CSS
Minifying CSS involves the process of reducing the CSS code by removing unnecessary characters such as whitespace, comments, and redundant code. It’s reduces the file size, leading to faster website load times and enhanced performance while maintaining the same styling effects on the website.
Remove Unused CSS:
This feature makes an ideal wholesale curve of all the CSS that isn’t used on your site, helping lower file size and load times. Head on over to CSS > Remove Unused CSS, and make sure it’s turned on. It essentially compiles down your site’s content and only takes the CSS rules that are in fact being applied, hence the load time is sped up dramatically.
Inline Critical CSS:
This brings the most important CSS inside your HTML automatically and speeds up rendering by reducing the number of CSS file requests. Critical CSS is the styles that are required for the above-the-fold content to use almost instantaneously. This feature should be enabled under Optimization > CSS > Inline Critical CSS.
Font’s:
Optimizing Google Fonts involves techniques to improve the loading time and performance of fonts on a website.

This can include reducing the number of font variants used, combining font requests, and implementing best practices to minimize the impact on page load speed while maintaining visual appeal.
Image Optimization
The thing is, pictures are usually the biggest files on that site. Improving load times and overall performance requires optimization of them.
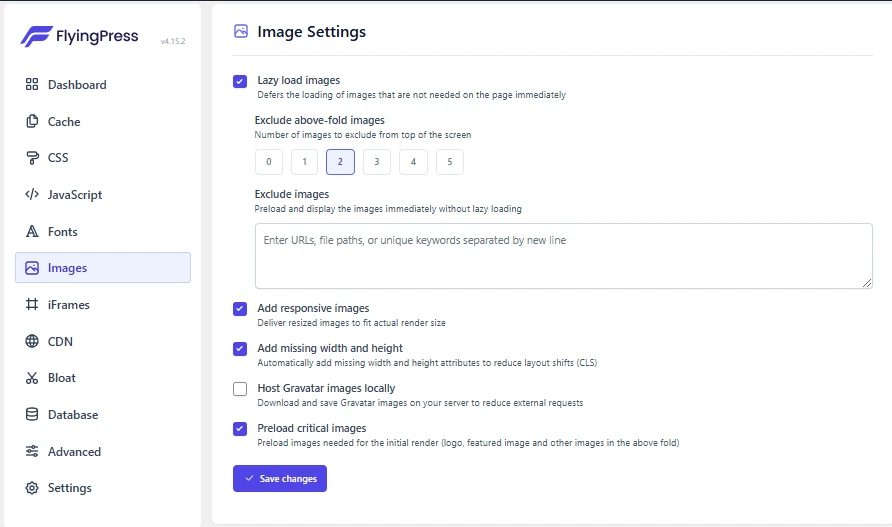
Lazy Load Images:
This sets everything to not load images until they appear in the view (viewport), meaning less initial load time. Go to Images > Lazy Load and make sure it is on. Lazy loading means that images will only load when they are about to be seen by the user, and so the time taken to first view the page will be vastly reduced.
Image Compression:
Images can be compressed and still lose no quality. By using FlyingPress you can automate the optimization of all images uploaded to your site, so no worries! Compressing levels can be set to balance quality and file size. Go to Images > Compression and change your desired compression level. The higher the compression, the smaller the files, but the less in image quality, so choose a setting that doesn’t compromise the image quality.
IFrames
An IFrame is an HTML element that allows you to embed another HTML document within the current one.
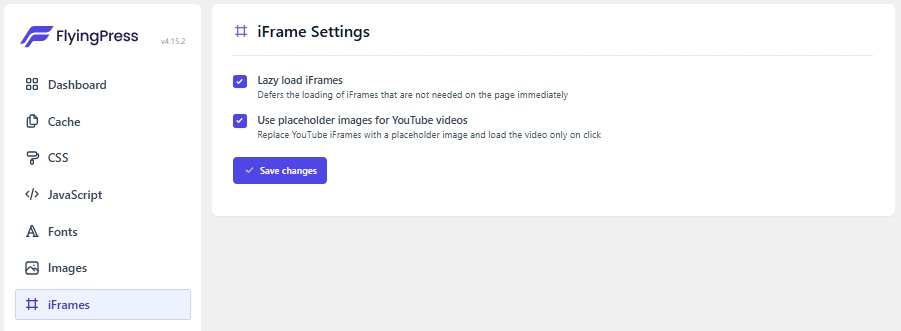
It is commonly used to embed content from other websites, such as videos from YouTube, maps from Google Maps, or other external web pages. IFames are useful for integrating external content seamlessly without having to leave the current page.
JavaScript Optimization
If you do not handle JavaScript correctly, it can have a serious impact on your page speed. High performance relies, however, on proper optimization.
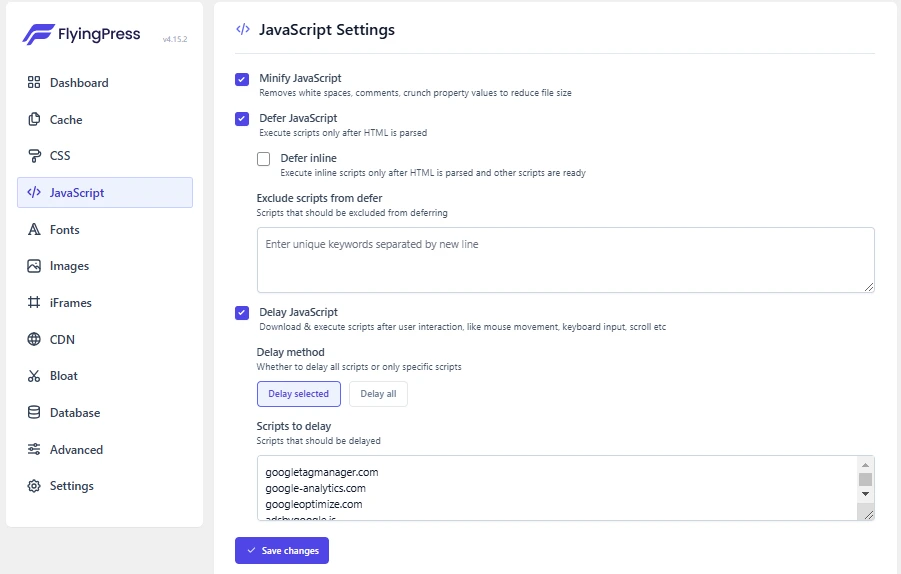
Minify Javascript:
Minifying JavaScript is a process to removing all unnecessary characters from the JavaScript code without changing its functionality. This includes eliminating whitespace, comments, and shortening variable names to reduce the file size. The main goal is to make the JavaScript file smaller and more efficient for faster loading times and improved website performance.
Defer JavaScript:
If you have the setup like this, JavaScript will be loaded in this setup after your main content has loaded, making it feel like you’re loading faster. Enable Defer JavaScript by going to Optimization > JavaScript > Defer JavaScript. By deferring JavaScript we’re not only helping to load the page faster by deferring JavaScript but we’re also helping to prioritize the loading the of essential content so users can begin interacting with your page before all your scripts have finished loading.
Remove jQuery Migrate:
If your site doesn’t require older jQuery versions, then removing the jQuery Migrate script speeds up performance. jQuery Migrate is for compatibility purposes but if your theme and plugins are updated, it’s typically not necessary. If you want to prevent loading of out of date scripts, turn this off in the same JavaScript optimization settings.
Database Optimization
Optimized and a clean database helps with an overall faster website performance via reduced bloat and faster data retrieval.
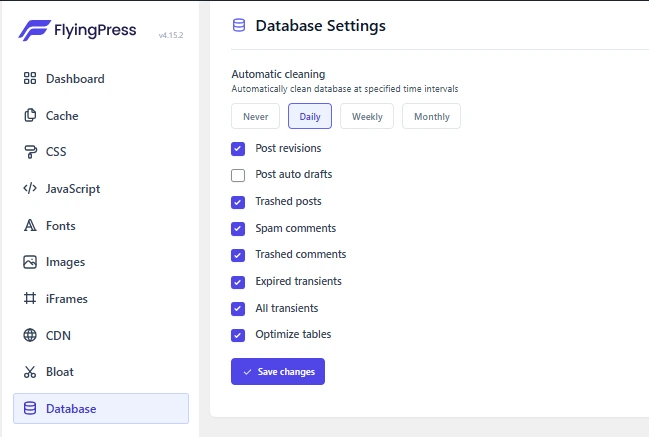
Clean Up Database:
Cleaning your database on a regular basis removes unused data, drafts and revisions that can be draining on your site. Go to Database > Optimization then setup scheduling to regularly clean up the DB. That involves deleting stuff like post revisions, spam comments, transients and unused tables. With a well structured database, you are able to keep up the pace in accessing and loading a page.
Advanced Options
In addition to the basics tweaks you can optimize your site further with some more fine settings.
Browser Caching:
There’s a set of times that makes the repeat load times better by storing the commonly used files to the users browser. Next head over to Advanced > Caching, then set the cache duration settings. This way, when returning visitors use a browser, it won’t have to reload files that have already been fetched in the past.
Monitoring and Adjustments
Keeping tabs on your site’s performance and making the necessary changes helps to maintain sustained high performance.
Google PageSpeed Insights:
Use Google PageSpeed insights to see your score and find out how to make your site faster but more regularly. Measuring your site’s performance and then giving you actionable recommendations are just a few of this tool’s offerings.
Analyze Results:
To dig a little deeper check out GTmetrix and Pingdom to see how your site compares against others in the same industry. These tool give report on load time, page size and few other critical performance parameter. Use this data to find the bottlenecks and modify your settings accordingly.
Conclusion
Achieving a perfect 100% score with FlyingPress requires a combination of meticulous configuration, ongoing monitoring, and regular adjustments. By following the detailed steps outlined in this guide, you can optimize your website’s performance, enhancing both user experience and SEO rankings.
Remember, the digital landscape is ever-changing, and staying on top of the latest trends and updates is key to maintaining high performance. By leveraging the powerful features of FlyingPress and continuously refining your settings based on performance data, you can ensure your website remains at the forefront of speed and efficiency.
A faster, more efficient website means happier visitors, better SEO techniques, and ultimately, more conversions and revenue. Embark on this optimization journey with FlyingPress and watch as your website scales new heights in performance and user satisfaction.

