Copy and Paste on Macbook is one of the simplest yet most essential skills when using a computer. On a MacBook, this function can save hours of repetitive typing, help you move files quickly, and even allow you to share content between your Apple devices instantly.
If you’ve just switched to macOS or upgraded to the latest macOS Sonoma 2025 version, you’ll be glad to know that the process is still easy, but with new features to make it even more powerful. This guide covers every possible way to copy and paste on a MacBook, from basic keyboard shortcuts to advanced productivity tricks.
1. The Classic Keyboard Shortcut Method
For most Mac users, keyboard shortcuts are the fastest and most efficient way to copy and paste. They require no navigation through menus and work almost everywhere in macOS, from typing documents to moving files in Finder. Learning these shortcuts early can significantly improve your productivity because your hands never need to leave the keyboard. Once committed to muscle memory, these key combinations become second nature, allowing you to perform tasks in seconds that would otherwise require multiple clicks.

Whether you’re copying a block of code, pasting a paragraph into an email, or moving files between folders, keyboard shortcuts remain the gold standard for quick actions.
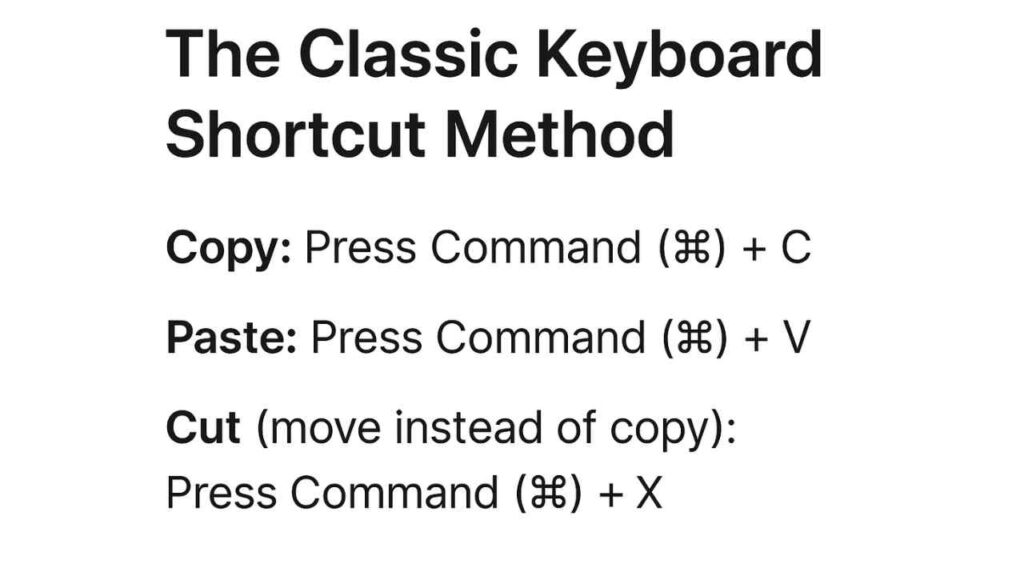
- Copy: Press Command (⌘) + C
- Paste: Press Command (⌘) + V
- Cut (move instead of copy): Press Command (⌘) + X
| Method | Shortcut / Steps | Best For | Extra Notes |
|---|---|---|---|
| Keyboard Shortcuts | Copy: ⌘ + CPaste: ⌘ + VCut: ⌘ + X | Fastest everyday use | Works in most apps and Finder (cut for files uses ⌥ + ⌘ + V) |
| Right-Click / Trackpad | Highlight → Right-click (or two-finger tap) → Copy → Paste | Beginners, visual navigation | Ideal when working with images or links |
| Universal Clipboard | Enable Handoff → Copy on one device → Paste on another | Apple ecosystem users | Requires same Apple ID, Bluetooth & Wi-Fi |
| Menu Bar | Edit → Copy / Paste | New macOS users | Always available, even if shortcuts fail |
| Drag & Drop with Option Key | Hold ⌥ while dragging → Drop to destination | File & media duplication | Green “+” icon confirms copy |
| Clipboard Manager Apps | Use apps like Paste, Maccy, Alfred | Power users | Stores history, search past items |
| Terminal Copy/Paste | Copy: ⌘ + C (with selection)Paste: ⌘ + V | Developers, command-line work | ⌘ + C without selection stops process |
| Paste Without Formatting | ⌥ + ⇧ + ⌘ + V | Clean text pasting | Removes unwanted styles |
2. Using the Right-Click Copy and Paste on Macbook
While keyboard shortcuts are fast, some users prefer a more visual method, especially when they’re still learning the Mac interface. The right-click menu offers a familiar way to copy and paste, particularly for those coming from Windows. On a MacBook, the trackpad is sensitive and customizable, allowing for two-finger taps or even assigning a corner click as your secondary click.

This method is also great for situations where you’re working with images, media files, or links, since you can preview and confirm what you’re copying before committing to the paste action. It’s slower than keyboard shortcuts, but it’s intuitive for beginners and useful when precision matters.
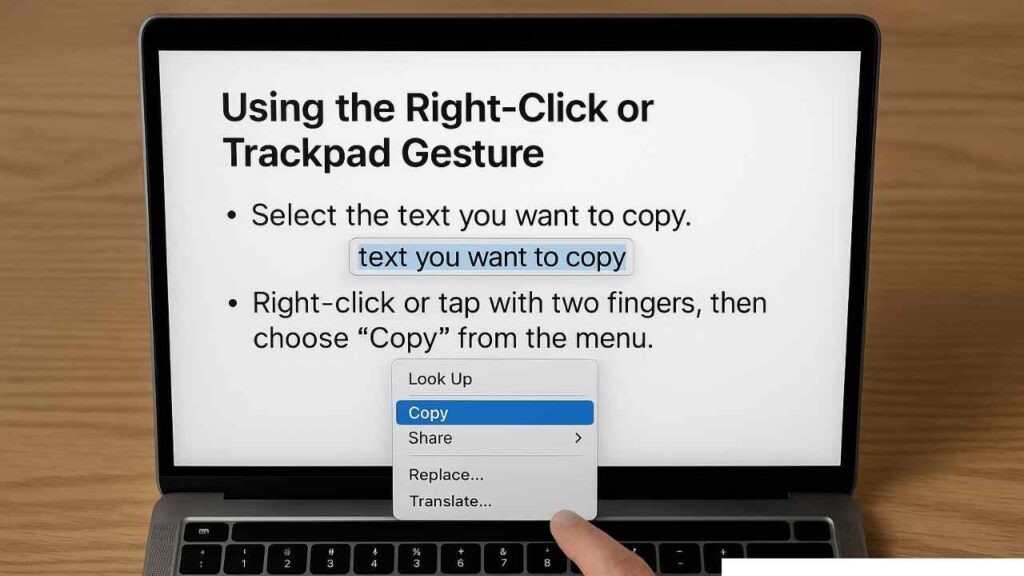
- Select the text, file, or image you want to copy.
- Right-click using a mouse, or tap with two fingers on your trackpad.
- Click Copy from the context menu.
- Navigate to your destination.
- Right-click again and choose Paste.
Read Also: When Will Tesla Phone Be Released in India? Rajkot Updates 2025
3. Copying and Pasting Between Apple Devices (Universal Clipboard)
One of Apple’s most underrated features, the Universal Clipboard, allows seamless copying and pasting between all your Apple devices. In 2025, macOS Sonoma has made this feature more stable and faster, meaning you can start working on your MacBook and instantly continue on your iPhone or iPad without emailing files or using cloud storage.
This is particularly useful for professionals who work across multiple devices, like designers moving images from a Mac to an iPad or students copying lecture notes from their iPad to a MacBook. The feature works in the background, so there’s no need to manually send anything. Just copy on one device, paste on another, and you’re done.
- On your MacBook, go to System Settings → General → AirDrop & Handoff and enable Handoff.
- Ensure both devices are signed into the same Apple ID with Bluetooth and Wi-Fi turned on.
- Copy on one device, paste on the other.
4. The Menu Bar Method for Beginners
If you’re completely new to macOS, the menu bar method might feel the most approachable. Every application on your MacBook has a consistent menu structure at the top of the screen, and the Edit menu always contains Copy and Paste commands. This is especially useful when you’re unsure if a keyboard shortcut will work in a specific app, as the menu options will be visible and clickable.
Additionally, the menu bar sometimes reveals extra paste options, such as “Paste and Match Style,” which can save you time formatting text. While slower than other methods, this approach reinforces your understanding of the Mac’s interface and helps you become comfortable with its universal layout.
- Highlight the content you want to copy.
- Click Edit → Copy.
- Place your cursor where you want to paste, then choose Edit → Paste.
5. Drag and Drop Copying
Drag and drop is one of the most natural gestures in macOS, and it works beautifully for copying files, text, and images. Instead of relying on shortcuts or menus, you can simply click and drag what you want to copy to another location. Holding the Option key while dragging makes a copy rather than moving the item, and macOS even gives you a small green plus icon to confirm the action.
This method is particularly useful when reorganizing files in Finder or when working on creative projects where you need to duplicate media between different applications. For visual learners, drag and drop provides an intuitive way to interact with content.
- Copy: Hold down the Option key while dragging an item you’ll see a green plus (+) icon.
- Drop it where you want it to appear.
6. Using Clipboard Managers for Extra Control
If you work with large amounts of data or frequently copy multiple pieces of text or images, a clipboard manager is an invaluable tool. By default, macOS only remembers the most recent item you’ve copied, but with a clipboard manager, you can store and organize an entire history of copied items. This is a massive time-saver for writers, programmers, and researchers who constantly need to recall snippets of text or media from earlier in the day. In 2025, popular clipboard manager apps such as Paste, Maccy, and Alfred integrate seamlessly with macOS, allowing you to search your clipboard history, pin important clippings, and even sync them across devices.
- Keep a history of everything you’ve copied.
- Search through past clippings.
- Paste formatted or plain text.
Read Also: AI vs Human Creativity | Who Wins in 2025?
The Mac’s Terminal app might look intimidating, but it also supports copy and paste with some slight differences. Terminal is used for running commands, scripts, and code, so pasting works differently to avoid accidental command execution. Knowing how to properly copy and paste in Terminal can save hours of typing for developers and system administrators. For example, you might copy a code snippet from a browser and paste it directly into Terminal without worrying about formatting errors. Just remember that if you press Command (⌘) + C without selecting text, it will send a “stop” signal rather than copying anything.
- Copy: Select the text first, then press Command (⌘) + C.
- Paste: Press Command (⌘) + V to insert the copied text.
8. Common Copy and Paste Problems and Fixes
Even in 2025, you might encounter copy-and-paste problems, but the fixes are usually simple. Sometimes, an app might temporarily lose clipboard access due to a software glitch, or Universal Clipboard may fail if your devices aren’t connected properly. Issues can also arise when pasting between apps that use different formatting systems, such as pasting rich text into a plain-text editor. Knowing the common causes of these problems and their solutions can prevent a lot of frustration. Restarting your MacBook often resolves temporary issues, but in some cases, checking for system updates or resetting Bluetooth/Wi-Fi can restore normal function.
- Clipboard not working? Restart your MacBook.
- Universal Clipboard not syncing? Ensure both devices are on the same Wi-Fi and Apple ID.
- Formatting issues? Use Command (⌘) + Shift + V to paste without formatting.
9. Advanced Tips for Faster Workflows
Once you’ve learned the basics, there are plenty of advanced copy-and-paste tricks to speed up your workflow. For instance, you can paste without formatting to keep your documents clean, copy multiple items with a clipboard manager, or take screenshots directly to your clipboard for quick sharing. Some professionals even use automation tools like Shortcuts in macOS to create custom copy-paste workflows, such as automatically copying data from one app and formatting it before pasting it into another. By combining these techniques, you can work smarter, reduce repetitive actions, and make the most of your MacBook’s capabilities.
- Paste Without Formatting Everywhere: Use Option + Shift + Command + V where supported.
- Multiple Copy Slots: Store more than one copied item using clipboard apps.
- Screenshots to Clipboard: Control + Shift + Command + 4 copies a screenshot without saving a file.
After learning these techniques, you’ll be able to copy and paste anything on your MacBook, text, images, files, even content between devices faster and more efficiently than ever before.

